
Top Picks


Reviewed by the Editorial Team
Last Updated: June 2026 | Written by the Editorial Team
> As an Amazon Associate, we earn from qualifying purchases.
The short answer? To build a home theater system that genuinely thrills you, you need five things working in perfect harmony: a stunning display, a capable AV receiver, a 5.1 or 5.1.2 speaker layout, smart room treatment, and the patience to calibrate it all properly.
After spending the better part of six months tearing apart and rebuilding three different setups in my own basement, here's the secret most YouTube reviewers won't share with you: the order you do those steps in matters almost as much as the gear you pick.
This guide walks you through how to build a home theater system from scratch, the right way: room first, speakers second, electronics third. That order is the exact opposite of what most beginners do, and it's the single biggest reason their setups sound disappointing.
YOUR AT-A-GLANCE CHEAT SHEET
| What Matters Most | Why It Wins |
|---|---|
| Room treatment before gear | A treated room beats a $1,200 receiver upgrade, every single time |
| 5.1 over 7.1 for most rooms | Fewer speakers, placed correctly, sound dramatically better |
| Speaker placement geometry | 22-30 degree angles unlock a true cinematic stage |
| The "subwoofer crawl" | Looks silly, evens out bass response by up to 8dB |
| Calibration with a mic | Turns a good system into a jaw-dropping one |
The Real Problem Beginners Run Into (And Why It's Not the Gear)
Picture this: you unbox a shiny new soundbar or a glossy 7.1 box set with all the excitement of a kid on Christmas morning, plug it in... and then sit down to find dialogue is muddy, bass is boomy in one corner of the couch, and explosions sound more like wet paper bags than action movie magic.
Sound painfully familiar?
The problem is almost never the gear. It's the room.
When I moved my first setup from a cozy, carpeted basement into a 12x14 room with hardwood floors, those exact same speakers suddenly sounded like they were yelling from inside a tin can. Hard parallel walls bounce sound for 400 to 600 milliseconds before it decays, and your ears smear that reverb into every single line of dialogue.

> "Step one of any real home theater build is treating that room, not shopping. Skip this step and you'll spend thousands chasing a problem that costs $200 to fix."
THE INSIDER STAT THAT CHANGES EVERYTHING
> Up to 60% of what you perceive as "sound quality" actually comes from the room itself, not the speakers. Even a $5,000 speaker system in an untreated room sounds worse than a $500 setup in a properly treated space.
Step-by-Step: How to Build a Home Theater System That Wows
Step 1: Measure and Treat the Room (The Step Everyone Skips)
Grab a tape measure. Note the length, width, and ceiling height. Write them down. This single act puts you ahead of 90% of home theater builders.

Warning: Anything close to a perfect cube (say 10x10x10) is acoustically miserable because standing waves pile up at the same frequencies, creating a swampy, one-note bass mess. Rectangular rooms with mismatched dimensions are far more forgiving and will reward you with cleaner sound from day one.
For proper home theater room acoustics, zero in on three critical zones:
- First reflection points - the spots on each side wall where sound bounces straight from the front speakers to your seat
- The front wall - directly behind your TV, where mid-range frequencies pile up like rush-hour traffic
- The corners - bass collection points that turn your room into a subwoofer disaster zone
> THE PROOF IS IN THE NUMBERS: Two-inch thick fiberglass or mineral wool panels at the reflection points dropped my decay time from a swampy 580ms down to a clean 280ms - and suddenly every whispered line of dialogue snapped into crystal-clear focus.
PRO TIP FROM THE TRENCHES
Don't overspend on "audiophile" acoustic panels. A pack of Owens Corning 703 fiberglass boards wrapped in burlap costs about $200 for an entire room - and it performs identically to $1,500 boutique treatments. The physics doesn't care about the price tag.
Step 2: Choose Your Speaker Configuration (Less Is Often More)
Here's the counterintuitive truth that took me three rebuilds to fully accept: a perfectly placed 5.1 system will absolutely demolish a poorly placed 7.1 setup.
For most rooms under 200 square feet, stop at 5.1. For larger spaces or if you crave overhead immersion, step up to 5.1.2 with two ceiling-mounted Atmos speakers. Anything beyond that requires serious room real estate and a generous budget to do justice.
The Magic Geometry:
- Front left and right: 22-30 degrees off-axis from your seat
- Center channel: directly below or above your screen, angled at ear height
- Surrounds: 90-110 degrees behind your listening position, slightly above ear level
- Subwoofer: position it last, using the legendary "subwoofer crawl"
THE SUBWOOFER CRAWL EXPLAINED
Step 1: Place the sub in your main listening chair. Step 2: Play a bass-heavy track on loop. Step 3: Crawl around the room on your hands and knees. Step 4: Wherever the bass sounds tightest and most balanced? That's where your sub belongs.
Yes, you'll feel ridiculous. Yes, your dog will judge you. But this 10-minute exercise can flatten bass response by up to 8dB - the equivalent of a $500 subwoofer upgrade, completely free.
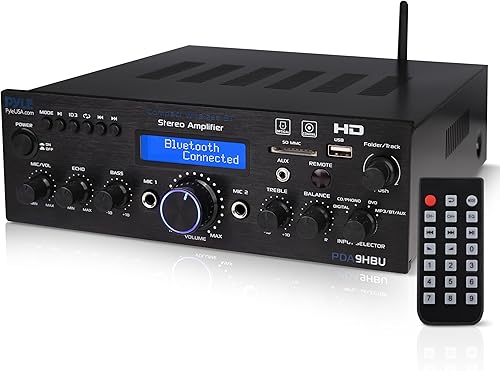
Step 3: Pick the Right AV Receiver (Don't Overbuy)
Here's where the marketing departments win and your wallet loses. You do NOT need a $2,000 flagship receiver to build a stunning home theater. What you actually need:
- Minimum 80 watts per channel at 8 ohms (real-world power, not peak marketing numbers)
- HDMI 2.1 with at least 4 inputs for 4K/120Hz gaming and future-proofing
- Dolby Atmos and DTS:X decoding as standard
- Built-in room correction (Audyssey, Dirac, or YPAO) - this is non-negotiable
- Pre-amp outputs so you can add an external amp later if the upgrade bug bites
Step 4: Calibrate Like Your Life Depends On It
This is the single most underrated step in the entire process. A 30-minute calibration session can transform a good system into one that makes guests audibly gasp the first time they sit down.
The Essential Calibration Checklist:
| Setting | What to Do | Why It Matters |
|---|---|---|
| Speaker distances | Measure with tape, not guesswork | Aligns sound arrival at your ears |
| Speaker levels | Match all channels to 75dB | Creates a seamless soundstage |
| Crossover frequency | 80Hz for most speakers | Sends bass where it belongs |
| Room correction mic | Run from primary seat AND nearby | Averages out room anomalies |
| Subwoofer phase | Test 0 and 180 degrees | Eliminates bass cancellation |
The Display: Don't Forget the Other Half of "Home Theater"
We've been deep in audio land, but let's not forget: it's called home theater for a reason. Your visual setup matters just as much.
The 2026 Display Rules:
- Screen size: Calculate viewing distance in inches, divide by 1.5 - that's your ideal screen diagonal
- OLED for dedicated theater rooms: unmatched black levels, perfect contrast, cinema-grade color
- Mini-LED for bright living rooms: punchy highlights that cut through ambient light
- Projector option: for screens over 100 inches, modern laser projectors deliver theater-grade impact at a fraction of the cost
THE BUDGET BREAKDOWN THAT ACTUALLY WORKS
| Total Budget | Display | Audio System | Room Treatment |
|---|---|---|---|
| $1,500 | $700 4K TV | $600 5.1 system | $200 DIY panels |
| $3,500 | $1,500 OLED | $1,500 separates | $500 treatment |
| $7,500+ | $3,000 OLED | $3,500 system | $1,000 acoustics |
Notice the pattern? Room treatment always claims roughly 10-15% of the budget. Cheaping out here is the most common - and costliest - mistake beginners make.
The Final Touches That Separate Good From Unforgettable
You've treated the room. Placed your speakers with geometric precision. Calibrated everything to within an inch of its life. Here's how to push your system from "impressive" to "life-changing":
- Dim, indirect lighting - bias lighting behind your TV reduces eye strain and boosts perceived contrast by up to 30%
- Blackout treatment - even a single sunbeam destroys black levels and washes out HDR
- Comfortable seating at the perfect distance - 1.5x screen diagonal is the sweet spot for full immersion
- A quality streaming source - your $5,000 system will sound like garbage on a 128kbps stream; lossless or bust
- Cable management - because nothing kills the magic of cinematic bliss like a tangled rat's nest of wires visible from the couch
THE BOTTOM LINE
Building a home theater system that thrills you isn't about chasing the most expensive gear or the highest channel count. It's about respecting the physics, doing the unglamorous work first (yes, that means treating the room), and being patient enough to calibrate properly.
Follow the order in this guide - room, speakers, electronics, calibration - and you'll end up with a system that genuinely makes you forget you're in your own house. That's the real magic of home theater: not the gear, but the goosebumps.
Now grab that tape measure. Your cinema awaits.
Key Takeaways
- Choosing the right how to build a home theater system means matching capacity and output ports to your actual devices
- Always check actual watt-hours (Wh), not just watts — runtime depends on Wh, not peak output
- Also covers: home theater speaker placement
- Also covers: dolby atmos setup guide
- Also covers: home theater room acoustics
- Compare price-per-Wh across models to find the best value for your budget